Saturday, April 23, 2011

A Little Paint......

   Well, Spring is finally sort of making an appearance.  The sun came out and temperatures finally creeped above the 40's.  Gee, it's almost May and the tulips haven't even bloomed yet!
  
   A couple days ago I finally pulled the tarp off the Pica and moved it over to the sawhorses/workbench.  There I realized I rather botched the "long winter's sleep department".

It wasn't really nice to look inside the boat and see this nice blush of mildew.  Curiously it didn't take on the floor or the bottom of the sides, on account of epoxy coatings there.
    Mildew, sure sign that I really didn't have the boat blocked off the ground well enough and moisture built up under the hull (upside down).  I will have to build higher bunks for next winter--as I suspect that this will happen whether the interior is painted or not.

    On the outside, more things pointing out that better storage is needed:

This is the view of the outside of the hull, and while the mildew is not as bad as the interior, there is still some checking and varnish failure.  Blue tarps just aren't that good.

  So... what to do?  Sadly, the mildew appeared the bloom under the varnish.  It also seemed to be the worst on the luan and somewhat on the plywood bulkheads.   Solid wood pieces were not affected, but that may be because there was either more varnish applied (varnish early and often--like voting).  It could also be that the plywood products did not present as tight a surface and so the varnish that was applied, just wasn't enough to fill the pores.   To note, the gunwales came through the winter in perfect condition.

  Not really sure what the mildew would do, or not do, but I wasn't too worried about the outside of the hull, as it was meant to be painted anyway.  To that end, I did some sanding the then painted it Rustoleum Topside Marine Paint.  Yeah, Rustoleum makes boat paint--with one caveat:  the paint is not meant to be submerged for long periods of time (over a week).  I don't think I'll have that problem, so I started by putting down a coat of primer.


   What a difference a coat of paint makes!   I didn't quite get it perfect (runs on one side) but those will sand out and I'm pretty confident I can make the finish coat look good.  Still not sure what to do with the interior as yet.   Much as I really want to get out onto the water, I really ought to get this done first.


Wednesday, January 12, 2011

It's a SAIL boat--

Well, some folks have the power of denying themselves gratification, but I'm just not that disciplined.  With the bull together, oars in hand and a mast raised, it wasn't much more to cut the sail and booms, figure something of the rigging and have that in order.  The leeboard and rudder--well they deserve their own stories (oh boy....).  Suffice it to say, time to take the boat out.

Frenchtown Pond State Park is a 52 acre flooded gravel pit, but is long enough and broad enough to make some decent sailing.  It's also the closest water to get to.  So, putting the boat on the car and trundling out with James (who brought his current 1 sheet skiff project, the Trudy C.) the challenge lay ahead, will it float? So, August 26 was the fateful day, and worked out to be a pretty good one.

Fiddling with the lines and not ready to sail anywhere, but it does float!
There was a decent breeze (anything around here rates as wind), and when I finally got the lines in order and the leeboard set--off I went!   As much as people complain that the Teal design is tender, I didn't find it that bad--certainly a whole lot more boat than a Harley 8!

And now we're sailing.  Oh so short lived--shallows ahead will not play well with the leeboard.
At the Pond, it's always into the wind to go west, and a true test of what a boat will do if you can get past the dock.  The Pica did that with ease and, as a bonus, tacked without stalling.  To say the least, it performs great.  There are no doubt boats that run rings around a Teal, but for starters this was pretty darned good.  Sadly, in not being mindful of lake conditions, and having made a really big leeboard, I eventually found that getting near the shore created problems.   After running the leeboard aground once, I was able to sail a bit more before it decided to fail when on a reach.  Even so, I was able to sail back to the dock.   Actually this was the first of many excursions, but one of only two with decent wind.  Well, lets me work on my rowing skills.

Ready Oar Not

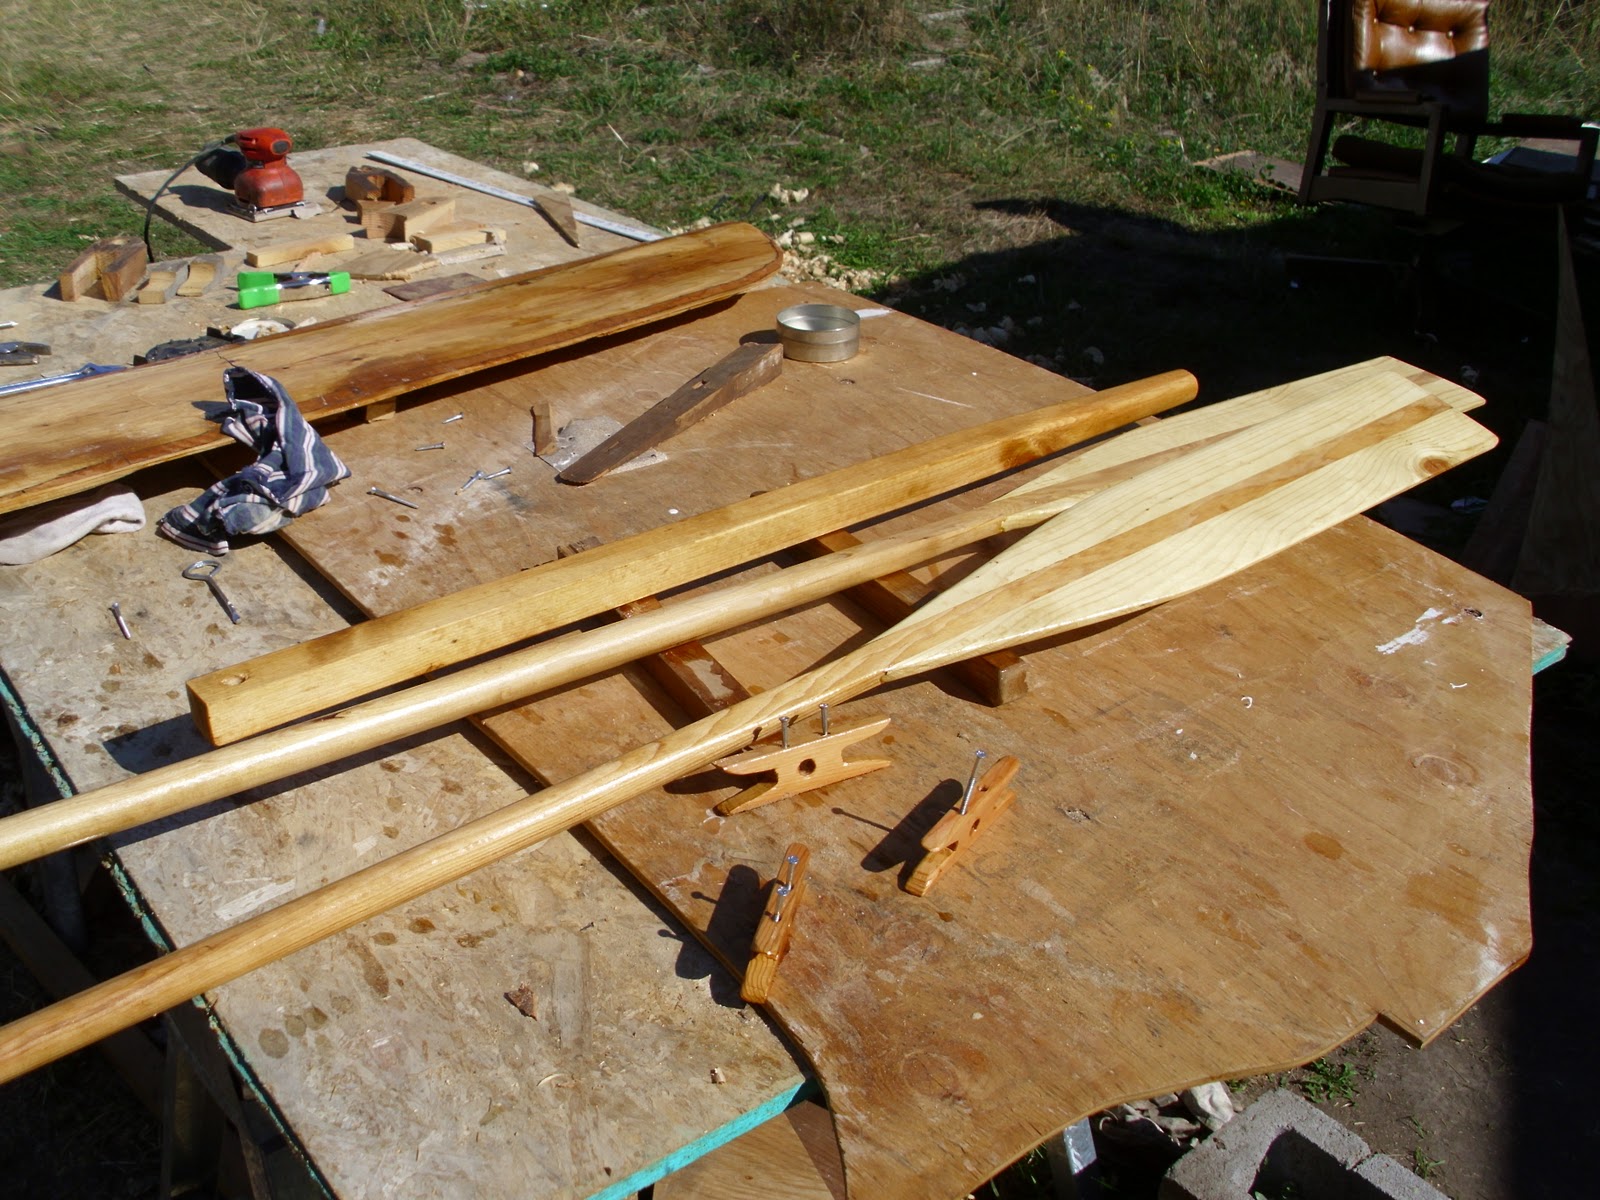
Well, if you don't have enough clamps...  improvise!  This is gluing the first blade to the oar handles.

So....it's going to be rather hard to take this boat anywhere if the wind dies-right?  Of course every proper boat needs oars and since I'm not rolling in cash to buy really pretty oars from the likes of Shaw and Tenney (warning pretty stuff at this link! http://www.shawandtenney.com/index.php ) so I guess I'll make my own.

There are a lot of ways to build an oar.  A lot of them require cutting the oar blank from solid lumber, which is great if you have a decent bandsaw and clear lumber to work with.  Well, this is a backyard boat and the sum total of heavy power tools used was the table saw for sawing out the gunwales and chines.  Another approach is needed.  Another route presented itself through Andrew Linn (note the Annas Discorse previously).  He has a page for building oars http://www.waderweb.com/plans/oars2/betteroars_0.htm  and you may like his route, or go some other, or just buy the fooled things.

Well, off to the lumberyard to get the parts.  The main oar is just closet rod--tough, pretty much clear of knots, and relatively lightweight.  The blade is supposed to be 1 x 2, but I (inadvertently) used 1 x 3.  The directions are pretty straight forward so it was a matter of cutting, planing flats on the rods (getting those in line with each other takes some care, but isn't hard). cutting the paddle blanks and gluing them on (Titebond II here-and don't skimp!).  Once the whole blank is glued up, the fun part starts.

Actually, you could take the blank and use it as an oar, but it'd look funny and be rather bulky in use, with a lot of extra weight on the end.  The suggestion is for the length of an oar to be twice the beam (at the gunwales) of your boat.  The beam of the Teal is about 42", so I went with 7 foot oars.  If that turns out too long, well I can always cut them down.

The fun is getting the paddle end to look like a paddle.  A lot of people have power planes.  How quaint.  Lacking yet another awesome power tool, I'll go dig out my big plane (Bailey #5) and have at it. 

If things go well for you, you'll wind up with something like this, and some sore arms from working the plane.  Thank gosh for power sanders at least.  This blade is made with 1x3's so might be a bit wider than others may suggest. 
There are certain tricks to using a hand plane on this sort of work.  The hardest part is planing at the upper portion of the blade, where it meets the handle.   Since the blade is not an even taper from the handle to the tip, you'll find you need to block up the upper portion of the blade to plane that area.  Rather hard to describe (ought I have made a video?) but it can be figured out.  One thing, when I started, I though commercial oars were a bit overpriced.  When I got done, James suggested I make him a set, but when he suggested a price, I thought that the commercial price really isn't that far out of line--and they have all that fancy power tools for the job!

This is more or less what you come up with.  Go nuts with the varnish and give it plenty of time to cure.   It will hold up better for you, but if you don't just sand and recoat.  Sharp eyed folks will see that knot on the one blade.  I was surprised that it didn't blow out while planing, but it hung in there.  Will talk later about the wooden cleats.


Monday, November 1, 2010

Sticky Wickets--or Fun with Epoxy!

Ok, back at it.  Of course I'm falling behind on my blogs, as will be really obvious with the next post.

Once I had bullied the hull together (well, it seemed that way with the chines......) I did a little informal test to see if I had any major problems with leaks.  This was another James idea that he tried with smaller boats and it seemed plausible to me.

So I filled the hull with water.   Not a lot mind you--actually only about 4 inches at the center, but enough to tell me where a leak might be an issue.   Well, it turned out to be an issue all over.  The bottom, being A-C plywood, was leaking like a sieve, with water dripping through all over, including I nice stream from the edge of the plywood sheet right at the middle.   Curiously the Luan had no problems, except for one nail hole.

At this point I had a choice:   I could epoxy and fiberglass just the chines and bow and stern, or I could glass that and the entire bottom.   The general consensus would have been to glass the bottom, but the hull weight is rapidly adding up and the eventual goal is for this to be cartoppable by one person.  Hmmm, what to do?

The most practical response from yelling out into the Internet was to epoxy the bottom and also to epoxy the interior and glass the chines and ends as usual.  I thought this a good strategy, and in hindsight probably saved me a lot of grief, as epoxy is a very tempermental critter.

Why is that?  Well, it's the darned pot life, and once it's gone, it's gone.  with the most interesting results.....

This was a one pint plastic container--a little smoke and heat and bingo, a hockey puck!  
 But I was working with a medium speed mix (Marine Epoxy from Duckworks) and working on very nice (80 degree) days--rather asking for trouble.   One recommended thing is to get the mixed epoxy into a shallow container (so it won't heat and self catalyze) and for gosh sakes--keep it out of the sun!

Still the results look good and with the sanding between coats and the glass on the chines as per Payson, I'm pretty happy with it.

Sunday, September 12, 2010

Bright and Brighter

Brightwork is pretty much just varnished woodwork.  Pretty stuff, but the varnish doesn't hold up quite as well as paint and so needs touch up work (sand and recoat) much more than paint.  Still, darned pretty stuff.  I've pretty  well decided that I will have some brightwork on the boat, namely on the gunwales and around the mast step.

Decided to tackle it sooner than later as the recent rains kept bringing out mildew on the gunwales and that just won't do.  So I tackled the matter.  Granted, it was just with a 1/2 pint of Ace Spar Varnish, but this isn't the most expensive boat out there, and I suspect the woodwork will be not be coddled--this is a cartopper after all.

So, after a lot of sanding to get off the mildew, spilled glue, and other defects, a wipe down to get the dust off and then a coat of varnish.  Well it makes all the difference, and will keep the wood clear of other hazards, including the errant paint drip or whatever else happens along.  No, not the most spectacular event of the build, but probably just as important.


Here one can see the gunwales in fresh varnish.  If it keeps the mildew away, all is well and good.

The Unsettled Details

Somewhere about now I really ought to have a name for the boat.  I mean all this effort and there's no appropriate name for it--heresy.  I suspect the traditionalist were wondering if I'd ever get around to it.  Well, I am.  In light of my background and interest in printing, especially with vintage letterpress and metal type; including having a Intertype (think the Apple version of a Linotype) it would make sense to reflect that.  So, the name of the boat is the Pica.  A pica, in printer's measure, is 12 points.  Six picas make and inc (actually a hair more).  Old timers with old typewriters will recognize Pica as the 10 characters to the inch measure that old typewriters worked at.   So, from hereon, we'll be talking about the Pica.
 
There are a few little problems that still hang around in the construction.  Some have been defeated, others have moved about and still present somewhat of a problem.  The first one was that nasty split in the chine caused by a knot turned the wrong way.  I first tried to fix the problem before the bottom was on with PL Premium, but the minute the clamps came off, the glue failed.  I revisited the issue in the hopes of getting the joint to settle down so that finish work could proceed.  I was finally able to resolve the issue through the funny Spanish windless method, though I'm not entirely sure.  However it did work.

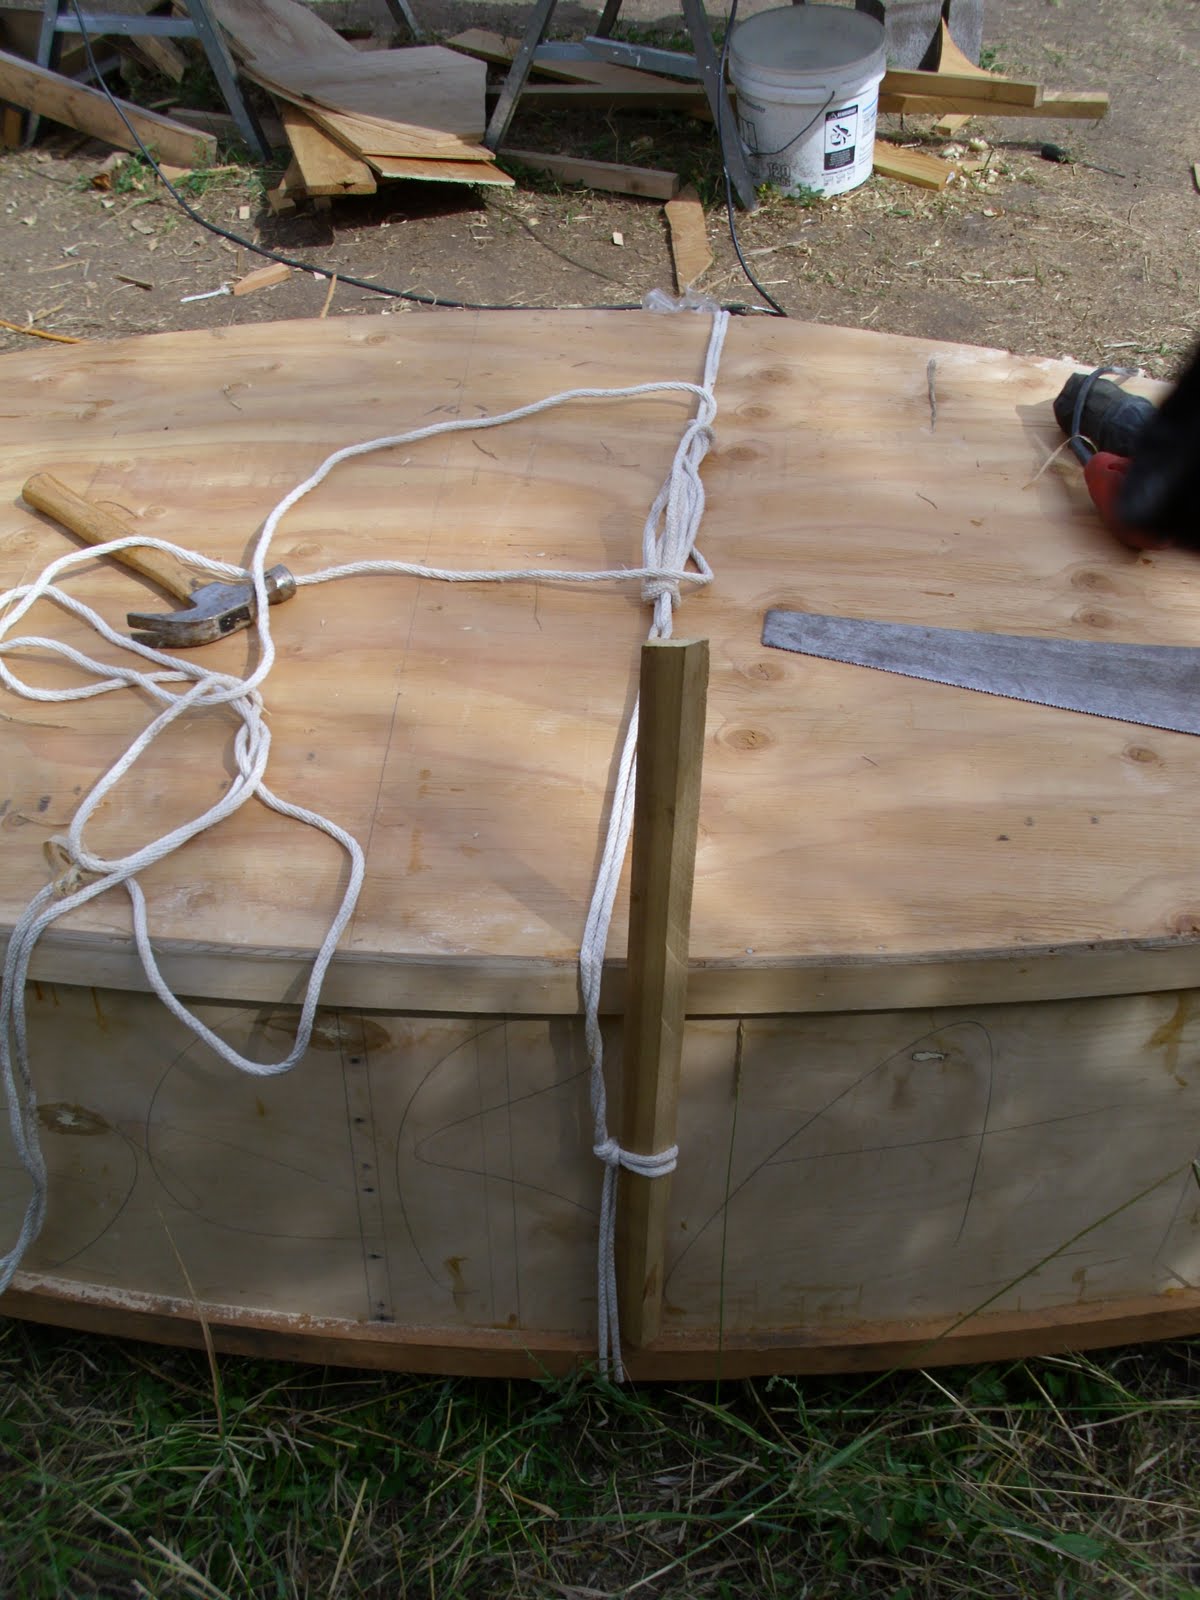
Here is the working side of the attempt to glue down the split.  The rope is bearing aginst a 1 x 2 which is pushing the split down.  This is being re-glued with Titebond II.  The plastic wrap is the keep the glue from sticking and it works really well, not only with Titebond, but also with PL Premium and probably epoxy even.

The working part of the windlass, Just wind 'er up.
 The glue joint held, it's been sanded down and hasn't acted up yet (even with a bunch of rain and damp).  However another problem won't go away, the chines at the stern were hard to pull together, and you might remember I had to pull it together with a bolt.  Well the gunwales are offering the same problem on one side, but more next time (blog has to catch up again).

Wednesday, September 8, 2010

Smoooooth

Well, after all the fun of getting the boat together comes the hard part--finish work.   All that surface needs some (or a lot) of attention to make it a decent surface for the paint and finish.   I suppose I could sail it as is, but that would be short lived economy.once the boat starts coming apart.

It seems that the about half the cost of a lot of boats is in the finish work (paint, varnish, fiberglass, etc).  I suppose one could also lose a lot in bells and whistles (fittings, etc) but still, a lot of attention needs to be placed on the finish, as that is the only thing that will protect your boat over the long haul--no paint=no boat.   


So, back to sanding.   The hull sides of this boat are 1/4" Luan, and at this point there is a reminder that it might be prudent to buck for beefier materials next time, as the Luan plywood is two rather wimpy laminations over one of decent thickness--really easy to sand through these outer layers--making getting off any of the glue drips a distinct challenge.   I guess that's why I annoy James by going after them all the time whether it's on my boat or not.   I'll be even pickier on the next build, down the road.

That white mark is not a good sign, as it means that the outer lamination has been sanded through, in an attempt to remove a glue drip (which I suspect is the unsandable PL Premium).  The only advantage of this is that the lamination is VERY thin.  Of course this area will be covered by epoxy and fiberglass, so this is not as terrible as it might appear.
I am not going to go for a mirror smooth finish as this boat is not going to be a showcase piece.  It will be nice, however and I intend for the finish to look good, so the worst of the bumps and lumps have to go, but in the end the boat needs to float and sail first--eye candy is a side benefit.   Never ending fun--and this is just the outside!