Showing posts with label hull. Show all posts

Sunday, September 12, 2010

The Unsettled Details

Somewhere about now I really ought to have a name for the boat.  I mean all this effort and there's no appropriate name for it--heresy.  I suspect the traditionalist were wondering if I'd ever get around to it.  Well, I am.  In light of my background and interest in printing, especially with vintage letterpress and metal type; including having a Intertype (think the Apple version of a Linotype) it would make sense to reflect that.  So, the name of the boat is the Pica.  A pica, in printer's measure, is 12 points.  Six picas make and inc (actually a hair more).  Old timers with old typewriters will recognize Pica as the 10 characters to the inch measure that old typewriters worked at.   So, from hereon, we'll be talking about the Pica.
 
There are a few little problems that still hang around in the construction.  Some have been defeated, others have moved about and still present somewhat of a problem.  The first one was that nasty split in the chine caused by a knot turned the wrong way.  I first tried to fix the problem before the bottom was on with PL Premium, but the minute the clamps came off, the glue failed.  I revisited the issue in the hopes of getting the joint to settle down so that finish work could proceed.  I was finally able to resolve the issue through the funny Spanish windless method, though I'm not entirely sure.  However it did work.

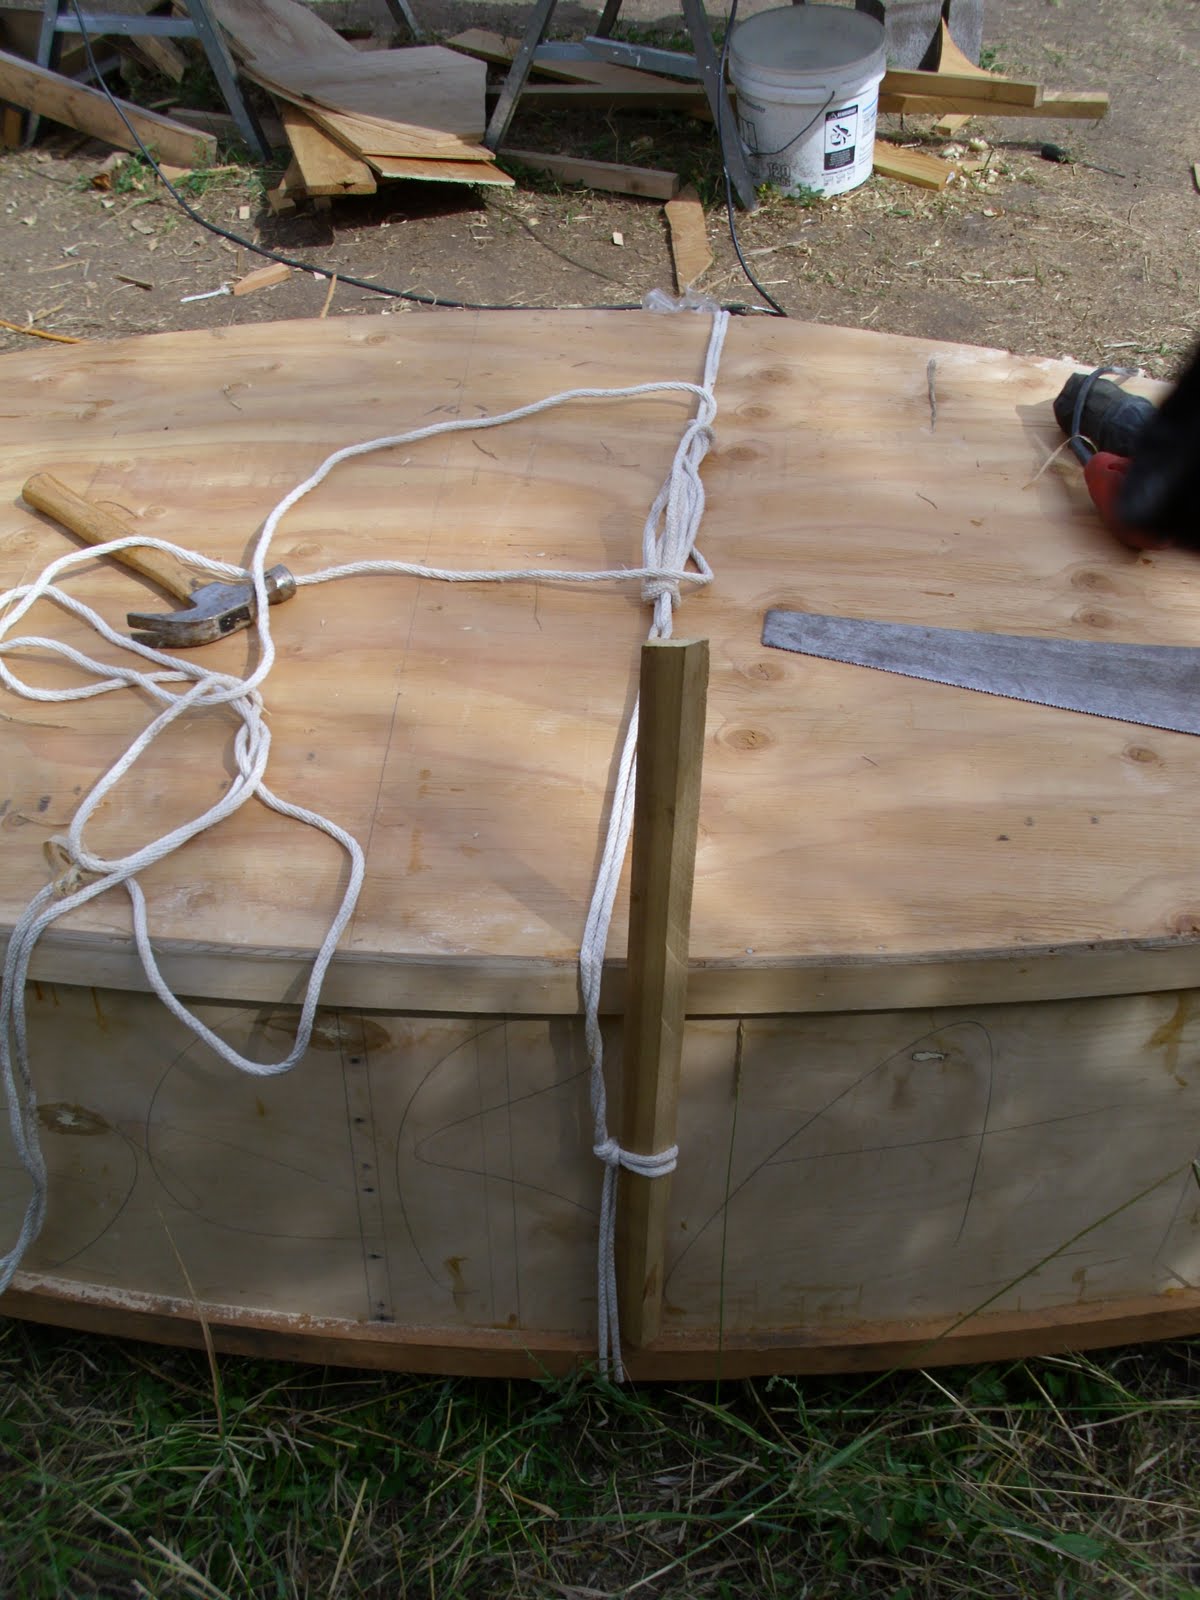
Here is the working side of the attempt to glue down the split.  The rope is bearing aginst a 1 x 2 which is pushing the split down.  This is being re-glued with Titebond II.  The plastic wrap is the keep the glue from sticking and it works really well, not only with Titebond, but also with PL Premium and probably epoxy even.

The working part of the windlass, Just wind 'er up.
 The glue joint held, it's been sanded down and hasn't acted up yet (even with a bunch of rain and damp).  However another problem won't go away, the chines at the stern were hard to pull together, and you might remember I had to pull it together with a bolt.  Well the gunwales are offering the same problem on one side, but more next time (blog has to catch up again).

Friday, August 27, 2010

Bottoms Up!

Well, with all this fiddling, you think I would put the bottom on this and get a move on.  Okay, hint taken.

Sawing out the bottom went fairly quick, though the final result came out roughly a 1/4" oversize overall.  That's not too bad, as that beats coming in under size.  I did have to wait a day to try to bind in a split in the chine (keep the knots facing in--the only knot and bang, the only split.......   I tried to put PL Premium (think an extra thick version of Gorilla Glue) into the cracked piece, cover with plastic wrap, and then clamp down with a piece of luan.  Well when I pulled the clamps, the joint lasted a whole five seconds before springing open again.  Probably should have used Titebond II.

Yeah, I thought I had this crack beat with PL Premium--5  SPROING!  Keep those knots on the inside folks. 


Well, since the split's going to be a pain, may as well put the bottom on.  Must note that this boat is gifted with "plan drift".  If you'll note, we had that bit of bother when we cut one of the sides in identical fashion.  This was resolved by cutting off the offending ends of the sides and putting longer butt plates on.  Okay, that's not bad, but what about those temporary frames than were glued in, and sank flush to the bottom of the sides......   Ahhh, that's a bit more interesting problem.

Turns out the 8 foot center portion comes within an inch of each of those frames, and of course there is no room for a traditional butt plate (as spec'd in the plans) to fit.   Gee, an inch?   Well I did have plenty of 1x2 stock and since  frames almost come down flush with the sides, what about just attaching the 1 x 2 to the frame and use that as a butt plate???  Well why not.   The items were cut and fitted (more on this), glued and screwed on and then allowed to cure a little bit.   When things were set up to my satisfaction, James (who was over since he wound up taking some glue home with him) helped me fit the bottom, starting with the bow portion.
This gives an idea of what the bottom butt plate came out to.  It is glued and screwed to the bulkhead and the bottom sheets are nailed to that (bedded in PL Premium).  Also shows to better effect the off balance cut of the side butt plates.  Oh well.

All sheets were laid on large beads of PL Premium and then nailed down with 1 inch nails.   What! no bronze nails?   Well, in the time period of building this boat, getting bronze nails (which won't rust if exposed to moisture) were a mail order item and the boat had progressed a long ways without bronze nails--so onward.  However, if I build another craft, I will go through the bother of ordering bronze nails for joinery, and copper nails for any clinched nail work (such as putting on butt plates).

We got the bottom on in very quick order (the advantage of working with two people).   Of course with the bottom laid down, without mishap, it was time to let the glue dry.   This gave the opportunity to pore over sail plans, as this will directly affect how we deal with the next major part of the boat--the mast!

Thursday, August 5, 2010

Onward! Onward! Part II

  Ok folks, to bring you up to date.  It's still Tuesday, I have miscut sides and a creatively cut sheet of plywood that's supposed to fix the mess---here goes.......

   Those nice big sides are pieced together from 3 seperate pieces of plywood, bound together with two butt splice plates that are glue, nailed, and clinched (bending the nails over).  Well those splices won't come apart, no matter how much I wish.   Since I creatively broke the replacement sheet, there's no practical way to cut out a replacement side.   Well, I was rather in a mope and relayed as much to James, who thought I would call when I had the new side cut and done.  Well no such luck as he had to get me off my "moaning chair" (Payson fans make note) and steer me back out to make things happen.

   Ok.  I can't remake the main center portion of the hull and I can't salvage the butt plates--since there's no way to take them apart.  Now what?    Well, some study of the issue helped.  One thing I had to do was make sure the fore and aft ends of the new butt plates matched the fore and aft positions of the other hull half, as these are locators for the "temporary" frames that mount later.   Well if the center portion is shorter (by the 2 inches on either end from the cut off butt plates) then the ends have to be longer, and so must the butt plates to keep the fore and aft ends in the correct position.  Confused?

You can see the larger butt plate on the upper half of the hull.  The lower hull shows the original setup (which was cut off the center of the upper.  The side to the left had to remain constant to allow fitting of the frames.
  

   Once the butt splices were set and the side glued up, we hit the next interesting problem.  In Bolger's plans, the connection at the bow  and stern are called stems.  In the plans, they show these as triangular pieces of lumber that are about 22 inches long and which would be a breeze to make up on a table saw....which we didn't have.  James took a stab at cutting some with a saber saw and made up a 3 inch chunk.  This wasn't going to work out well.  Hmmmm, where to go?  James suggested Home Depot, but I figured they would laugh at us at best and sic lawyers on us for endangering their staff.   Hmmmm some more.  Finally I thought to visit a woodshop I knew was nearby.  Never had been in there before, but gee I needed something fixed, so let's go to the local wood mechanic, as it were.    James I think was doubtful, but what the hey eh?   The shop is Wood Fusion Studio http://www.woodfusion.com/ and taking a piece of 2 x 4 and the Instant Boat book with me, the owner (whose name I failed to remember) was able to take the 2x4 and make nice triangular stem pieces very quickly.  Thanks!

   So, back to the boat at hand.   With stems in hand, and a main frame made up, it was pretty much time to assemble.  For some reason though, it seamed the temporary frames didn't fit.  The ends fit up beautifully and a little more study showed that I was trying to put the temporary frames in the wrong places.  Swapping them about fixed the problem neatly.  It was suggested, and I like the idea, that the temporary frames (plywood) might be the basis for making a couple airboxes for the boat.  I thought they were a good idea, so slathering from PL Premium and fitting them in yielded a very nice start to the boat.  The other thing noted is that the thing is big (relative to a Harley 8.  Others might think the vessel is minuscule, but if I can lay down in it (more or less), it's pretty roomy.


Yours truly while laying out on the yet to come deck of the Teal.  People claim that there's not a lot of room inside, but for two, not terribly overside, folks I think it would work.   Weight would be a bigger problem for boat handling, but I'll deal with that when I get there.