Monday, November 1, 2010

Sticky Wickets--or Fun with Epoxy!

Ok, back at it.  Of course I'm falling behind on my blogs, as will be really obvious with the next post.

Once I had bullied the hull together (well, it seemed that way with the chines......) I did a little informal test to see if I had any major problems with leaks.  This was another James idea that he tried with smaller boats and it seemed plausible to me.

So I filled the hull with water.   Not a lot mind you--actually only about 4 inches at the center, but enough to tell me where a leak might be an issue.   Well, it turned out to be an issue all over.  The bottom, being A-C plywood, was leaking like a sieve, with water dripping through all over, including I nice stream from the edge of the plywood sheet right at the middle.   Curiously the Luan had no problems, except for one nail hole.

At this point I had a choice:   I could epoxy and fiberglass just the chines and bow and stern, or I could glass that and the entire bottom.   The general consensus would have been to glass the bottom, but the hull weight is rapidly adding up and the eventual goal is for this to be cartoppable by one person.  Hmmm, what to do?

The most practical response from yelling out into the Internet was to epoxy the bottom and also to epoxy the interior and glass the chines and ends as usual.  I thought this a good strategy, and in hindsight probably saved me a lot of grief, as epoxy is a very tempermental critter.

Why is that?  Well, it's the darned pot life, and once it's gone, it's gone.  with the most interesting results.....

This was a one pint plastic container--a little smoke and heat and bingo, a hockey puck!  
 But I was working with a medium speed mix (Marine Epoxy from Duckworks) and working on very nice (80 degree) days--rather asking for trouble.   One recommended thing is to get the mixed epoxy into a shallow container (so it won't heat and self catalyze) and for gosh sakes--keep it out of the sun!

Still the results look good and with the sanding between coats and the glass on the chines as per Payson, I'm pretty happy with it.

Sunday, September 12, 2010

Bright and Brighter

Brightwork is pretty much just varnished woodwork.  Pretty stuff, but the varnish doesn't hold up quite as well as paint and so needs touch up work (sand and recoat) much more than paint.  Still, darned pretty stuff.  I've pretty  well decided that I will have some brightwork on the boat, namely on the gunwales and around the mast step.

Decided to tackle it sooner than later as the recent rains kept bringing out mildew on the gunwales and that just won't do.  So I tackled the matter.  Granted, it was just with a 1/2 pint of Ace Spar Varnish, but this isn't the most expensive boat out there, and I suspect the woodwork will be not be coddled--this is a cartopper after all.

So, after a lot of sanding to get off the mildew, spilled glue, and other defects, a wipe down to get the dust off and then a coat of varnish.  Well it makes all the difference, and will keep the wood clear of other hazards, including the errant paint drip or whatever else happens along.  No, not the most spectacular event of the build, but probably just as important.


Here one can see the gunwales in fresh varnish.  If it keeps the mildew away, all is well and good.

The Unsettled Details

Somewhere about now I really ought to have a name for the boat.  I mean all this effort and there's no appropriate name for it--heresy.  I suspect the traditionalist were wondering if I'd ever get around to it.  Well, I am.  In light of my background and interest in printing, especially with vintage letterpress and metal type; including having a Intertype (think the Apple version of a Linotype) it would make sense to reflect that.  So, the name of the boat is the Pica.  A pica, in printer's measure, is 12 points.  Six picas make and inc (actually a hair more).  Old timers with old typewriters will recognize Pica as the 10 characters to the inch measure that old typewriters worked at.   So, from hereon, we'll be talking about the Pica.
 
There are a few little problems that still hang around in the construction.  Some have been defeated, others have moved about and still present somewhat of a problem.  The first one was that nasty split in the chine caused by a knot turned the wrong way.  I first tried to fix the problem before the bottom was on with PL Premium, but the minute the clamps came off, the glue failed.  I revisited the issue in the hopes of getting the joint to settle down so that finish work could proceed.  I was finally able to resolve the issue through the funny Spanish windless method, though I'm not entirely sure.  However it did work.

Here is the working side of the attempt to glue down the split.  The rope is bearing aginst a 1 x 2 which is pushing the split down.  This is being re-glued with Titebond II.  The plastic wrap is the keep the glue from sticking and it works really well, not only with Titebond, but also with PL Premium and probably epoxy even.

The working part of the windlass, Just wind 'er up.
 The glue joint held, it's been sanded down and hasn't acted up yet (even with a bunch of rain and damp).  However another problem won't go away, the chines at the stern were hard to pull together, and you might remember I had to pull it together with a bolt.  Well the gunwales are offering the same problem on one side, but more next time (blog has to catch up again).

Wednesday, September 8, 2010

Smoooooth

Well, after all the fun of getting the boat together comes the hard part--finish work.   All that surface needs some (or a lot) of attention to make it a decent surface for the paint and finish.   I suppose I could sail it as is, but that would be short lived economy.once the boat starts coming apart.

It seems that the about half the cost of a lot of boats is in the finish work (paint, varnish, fiberglass, etc).  I suppose one could also lose a lot in bells and whistles (fittings, etc) but still, a lot of attention needs to be placed on the finish, as that is the only thing that will protect your boat over the long haul--no paint=no boat.   


So, back to sanding.   The hull sides of this boat are 1/4" Luan, and at this point there is a reminder that it might be prudent to buck for beefier materials next time, as the Luan plywood is two rather wimpy laminations over one of decent thickness--really easy to sand through these outer layers--making getting off any of the glue drips a distinct challenge.   I guess that's why I annoy James by going after them all the time whether it's on my boat or not.   I'll be even pickier on the next build, down the road.

That white mark is not a good sign, as it means that the outer lamination has been sanded through, in an attempt to remove a glue drip (which I suspect is the unsandable PL Premium).  The only advantage of this is that the lamination is VERY thin.  Of course this area will be covered by epoxy and fiberglass, so this is not as terrible as it might appear.
I am not going to go for a mirror smooth finish as this boat is not going to be a showcase piece.  It will be nice, however and I intend for the finish to look good, so the worst of the bumps and lumps have to go, but in the end the boat needs to float and sail first--eye candy is a side benefit.   Never ending fun--and this is just the outside!

Wednesday, September 1, 2010

Raising the Mast


In our previous installment, I bored a lot of you to death with a windy essay on "plan drift".  You can wake up now.  Anyway a couple pix to detail what I did with the mast and how the stock installation should look.   First, where things stand pretty much right now.

 Well it looks spartan and in a fashion it is.  Since I didn't get the forward thwart to fit as tight as it ought, I will probably remake the part.  Also wound up splitting one of the upper rails.  Still it'll work for now.   That's is not the mast, just some lumber mocked up for a mass for checking vertical.
So, what's going on here?  The stock Teal design uses the thwart as the mast step and a small box with a square hole for the mast partner.  It's designed to go in one place and is meant for the stock sail rig, such as this:

This shows a pretty stock Teal, the handling of the mast step has been handled very nicely (though I notice that's not a spirit rig....).   This picture was liberated from http://www.duckworksmagazine.com/06/gatherings/scuzbums/index.htm  This is  Duckworks magazine blog, which is part of the rest of their site, and store  http://www.duckworksbbs.com/hardware.htm--which is where my epoxy, rope and glass are coming from, so I hope they don't mind this liberty.

The reason I built mine different was because I knew I was going to have decked bow and stern (those glued in frames).  I figured that the mast step rails could go forward and help secure a bowsprit (were I to go the jib route), so could be finished as brightwork, with room for stowing stuff below.  Since I had assembly issues with the first go round, the whole works (not the mast partner though) will be replaced with items of a better fit and finish (matching wood if going the brightwork route).  A couple blocks bridging the rails will retain the mast and partner.  Actually a more complicated than the original design, but now any rig could be hung on the boat (well pert near).  

Oh, and the mast too.  Getting back to the build, it started out as four 1 x 3's from Home Depot (who had 1 x 3s, for the person without the table saw).  Dig out the clamps and Titebond II and away we go.....  The mast is a three plank lamination that comes out to a 10' 8" mast.  The first two planks were held together with screws, but the third plank lamination had to be held with clamps and weights..It would be practical to do this part on a nice chunk of concrete or driveway, so as to avoid any bow in the finished product (I seem to have a 1/2" bend over the length of the mast
A few clamps and a lot of lead (I'm a letterpress printer with a Linotype, so finding weights is not a problem).
 So now I have a 2 1/4" stick.  Don't need all that wood, honestly, and who doesn't like a round mast?  So, a little creative cutting with the circular saw to rough off the corners and back to work with the hand plane--a couple hours later yields results.
If you look at the pencil, you can see the curvature--if all else fails, this will make one hell of a spar for somebody.
The finished product, though the top of the mast needs a finish trim.  The mast has an oval cross section, with the laminate layers running fore and aft.


So here it is, suppose it should be a bit more dashing at this point, but it's pretty boatlike so far.


Before Raising the Mast

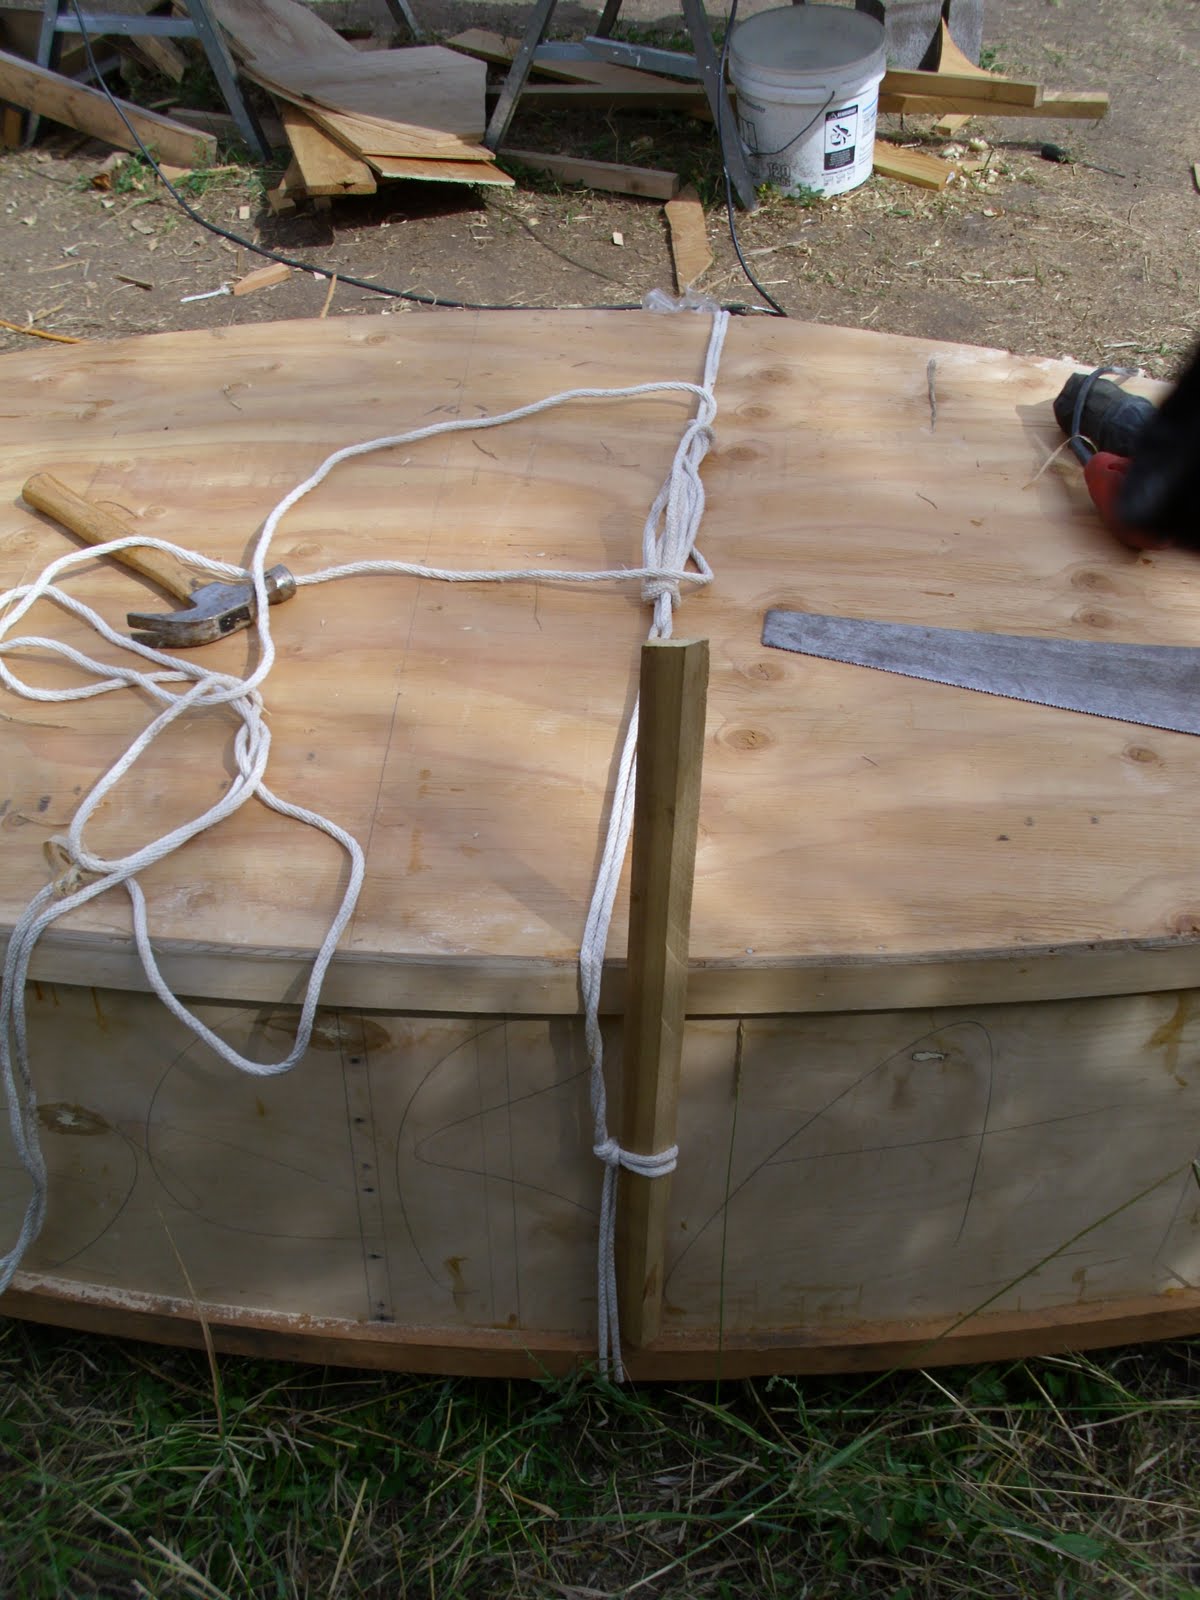
Remember plan drift?  It works by accident, and can happen by design. 

So why would a person steer away from a perfectly good plan offered up by a designer that will yield a perfectly usable boat?   I mean, it would seem that by now there ought to be a boat for every conceivable taste and desire, from racing to puddle jumping.   I mean, it's as easy as jumping on the Internet and looking, right?

Well, finding a boat design on the Internet is kind of like buying a car, unseen, off of Ebay--especially if it's a model you've never owned before.    Now, how did I even pick a Teal?  Well the original idea was to build a Harley 8 (think cheap sailing experience).  My friend James said that, "No, you won't be happy with that".   Now, of course during his build of his Harley 8, the Teal kept popping up as a "neat" boat.  Still James wanted something bigger (he's going to build Michalak's Mayfly 14) because he wants to carry two people in the boat.   The Teal looked really appealing, and before l knew it, here I am.   Not building a cheap boat either; phooey!

Now, is the Teal THE boat for me?  Well, probably not, but since this whole exercise was not born of my "wanting" a boat, it's more a matter of grabbing the most available plan vessel and going for it.   But, that is NOT recommended if you're WANTING a boat.

So, back to the mast.   Why on earth would I not follow Bolger/Payson's perfectly sensible spirit rig?   I honestly can't say, but the spirit rig didn't look too user friendly and lacked one vital element that somebody else suggested I have--the ability to reef the sail or otherwise depower the rig (short of dropping sail and rowing).   Also, a 16 (ok, 15'8" and some) foot mast?  Egad, that's a lot of mast way up there or on top of my car.  Still, it fits the Bolger imperative in many of his "instant" boats of "simple, simple, simple", as in instant, not espresso.

Since I am effectively a newbie, I also didn't want to have too much sail and the attendant hazard of dumping the boat and then trying to recover it.   However, in the future, I might.   That's the point where they say you should build another boat, but why not make the current boat more flexible so I can change things about?  The most changeable thing on a sailboat is the sail rig, and changing that moves the sail's center of effort, which either means moving the leeboard/daggerboard, or moving the mast.   Well, easier to build a multi-position mast step than a multi-position leeboard, which would be a lot easier than a multi-position daggerboard or centerboard (though it's probably been done).

Well that's my story and I sticking to it.  The initial sail rig will be a balanced lug.   It's also a simple rig, though probably not a as simple as a spirit, since the lug requires some extra setup and tensioning to work right.  However it runs on a lot shorter mast and is a lot simpler to cut out (yes, the good ol' blue poly tarp special).
Eventually I might try the gaff with jib that the Annas Discorse has, simply because it looks a lot more "boaty", but it may be a poorer performer.  Might not even get that far, but I will get this boat built--otherwise I'd have an interesting half built thing in the backyard.  Besides, I've already ordered the epoxy (ouch!) and it's on it's way as I write.

Next time I'll put up pictures of what I did (on the mast step) and let others rate my wisdom on that.  Still, it's my boat and if it all comes out wrong (or right) it's going to be my problem or success.  Your mileage will certainly vary.

Sunday, August 29, 2010

Fiddly Bits

One thing I have found is that boats do not come with square corners.  Well, I suppose if I built a barge or a box boat, such as a PD Racer, I might find some square corners, but a double ended sharpie like the Teal comes with virtually none.

With that means cutting lots of odd shaped pieces, including some that are all odd angles, such as the blocks for holding the thwart that would normally serve as the entire mast step.  Mine's a little different, but still needs someething to mount to the hull.  To that effect I wound up making two blocks with no right angles.  I was at least able to use some old chine stock that James had leftover, but even the angle on the top of it had to be adjusted to suit--this on a 4" long piece of wood and no vise handy.   Enter the solution (see picture) but don't try this at home!

Sometimes you just need a little dab to do ya.  Using a plane like an old style box grater was what worked in this case--but watch your fingers!
All that fuss for what?   Well here's the part in action--note the thwart sits a little forward, but this thwart and mast step are sort of placeholders and will (eventually, if not sooner) replaced.


  I suppose one other neat tool to have for this sort of work is a chop saw that can cut compound angles--well if this was a trade, you betcha.  May as well toss in a shaper, edger, planer, sander and ..........  the list is endless.  Still, if you want to, go nuts.

Friday, August 27, 2010

Bottoms Up!

Well, with all this fiddling, you think I would put the bottom on this and get a move on.  Okay, hint taken.

Sawing out the bottom went fairly quick, though the final result came out roughly a 1/4" oversize overall.  That's not too bad, as that beats coming in under size.  I did have to wait a day to try to bind in a split in the chine (keep the knots facing in--the only knot and bang, the only split.......   I tried to put PL Premium (think an extra thick version of Gorilla Glue) into the cracked piece, cover with plastic wrap, and then clamp down with a piece of luan.  Well when I pulled the clamps, the joint lasted a whole five seconds before springing open again.  Probably should have used Titebond II.

Yeah, I thought I had this crack beat with PL Premium--5  SPROING!  Keep those knots on the inside folks. 


Well, since the split's going to be a pain, may as well put the bottom on.  Must note that this boat is gifted with "plan drift".  If you'll note, we had that bit of bother when we cut one of the sides in identical fashion.  This was resolved by cutting off the offending ends of the sides and putting longer butt plates on.  Okay, that's not bad, but what about those temporary frames than were glued in, and sank flush to the bottom of the sides......   Ahhh, that's a bit more interesting problem.

Turns out the 8 foot center portion comes within an inch of each of those frames, and of course there is no room for a traditional butt plate (as spec'd in the plans) to fit.   Gee, an inch?   Well I did have plenty of 1x2 stock and since  frames almost come down flush with the sides, what about just attaching the 1 x 2 to the frame and use that as a butt plate???  Well why not.   The items were cut and fitted (more on this), glued and screwed on and then allowed to cure a little bit.   When things were set up to my satisfaction, James (who was over since he wound up taking some glue home with him) helped me fit the bottom, starting with the bow portion.
This gives an idea of what the bottom butt plate came out to.  It is glued and screwed to the bulkhead and the bottom sheets are nailed to that (bedded in PL Premium).  Also shows to better effect the off balance cut of the side butt plates.  Oh well.

All sheets were laid on large beads of PL Premium and then nailed down with 1 inch nails.   What! no bronze nails?   Well, in the time period of building this boat, getting bronze nails (which won't rust if exposed to moisture) were a mail order item and the boat had progressed a long ways without bronze nails--so onward.  However, if I build another craft, I will go through the bother of ordering bronze nails for joinery, and copper nails for any clinched nail work (such as putting on butt plates).

We got the bottom on in very quick order (the advantage of working with two people).   Of course with the bottom laid down, without mishap, it was time to let the glue dry.   This gave the opportunity to pore over sail plans, as this will directly affect how we deal with the next major part of the boat--the mast!

Is that all the faster you can go?

    Well, the last installment didn't really note any progress, but both gunwales were mounted, the fir used is wonderful wood and gave no fuss or muss during installation.  Now I need to progress to putting the bottom on.   I was somewhat concerned that my hull had suffered "plan drift" but when I measured the beam against the plans, I was within a 1/2 inch (over).   This qualifies as a good thing.

     However, not all clear sailing....   The temporary frames, which were cut from plywood, were not meant to bottom against the bottom of the side sheets.  In assembly, that is what mine did.    Now it might be that the frames were cut wrong, more measurement might be necessary.   The reason this is a problem is because the butt plates for the bottom are in roughly the same position as the frames.  A solution is being engineered, much to the chuckling (or just plain annoyance) of boat designers Bolger/Payson.

Monday, August 23, 2010

Beyond the Hiatus

  The danger of building a boat, or any other project that is longer than a day, is that things crop up that distract one from getting the job done.  In my case, it was working on a steam boiler to accumulate operating hours required in Montana to have one's own traction (which can include railroads, cranes, or tractors) license.  Now of course I'm supposed to be chasing those hours down and now that's not getting done.   However, I'd sooner just blame the Internet as the grand folly of time-wasting.    Now, enough of that.

   In our last installment (yes, boat building as a soap opera--or serial thriller?) I have just secured the chines and bemoaned the world of short wood.  Oh what to do?   Well I needed 16 foot pieces to make up the gunwales, so went out and found a really beautiful  chunk of 1 x 4 fir--absolutely clear stuff and actually cheaper than what all I bought at Home Depot.  Of course it's a 1 x 4, and I need 1 x 2s and the lumber yard didn't have a table saw.   This isn't going well.

    Or can be considered an elementary lesson in boat building.....get a table saw (preferably one than can cut a miter.   Also wouldn't hurt to have some roller stands to help manage your lumber as you cut it.   So, what to do?    Well, James mentioned he has a very friendly neighbor (whom I`ll thank profusely) who would lend him said saw.   Okay, put the plank on the roof and away we go (the plank handling so much better than the luan....).   We got my board cut in 1/2 and James got his chine for his One Sheet Skiff in the same session.  The neighbor got his shop floor swept and things dug out from behind the saw that he may not have seen in a while.   Everybody wins!

     Now, those boards didn't come out precisely in 1/2, so my 1 x 2s were not a match.  Well, let's bring out my favorite tool for boat building (well within my very limited experience.
Just an old Stanley plane, but just about a perfect size for putting the proper angle on the chines.

   My chines were just plain 1 x 2, but in the beginning I knew I wanted to plane them down to the flat of the bottom, rather than taking my chances (of getting it wrong) with a table saw.   This is what happened with James' One Sheet Skiff.   It had migrated to my yard because build variations turned it into a 1.1  sheet skiff and he didn't have quite enough wood.   Remember that bum sheet of luan?  Sharing materials and tools can expedite work on all boats all around.   His boat actually went home today, after getting gunwales and the hull bottom fitted.   I guess that means he's getting ahead.....

Looks like a boat yard....   James Maxwell's S/V Sea Hawk is on the bench, mine is in the background on the ground.

Friday, August 6, 2010

The Seductive Annas Discors

   The Teal is considered a very attractive small sailboat.  It can be built in a variety of different ways, though generally it is an open cockpit, including in front of the mast.  It can be built plain, or it can be souped up, well in fit and appearance, to be so much more than a boat to mess about in.

   Enter the Annas Discourse:   Andrew Linn, a fine boat builder, built a basic Teal hull, then passed the hull onto his friend Pat Pattson, who created an absolutely (to me) beautiful craft.  It has some elements (coamed and closed in cockpit) that would not lend themselves to a car topper (which mine will be) but the little bits and details make this craft stand out, or at least make me say "I want one!"
Andrew Linn with the Annas Discorse.  Sharp eyed readers can pick out the variants from the Teal design, but on the whole, that's what she is.

A look inside the cabin shows a daggerboard housing (no fiddling with lee boards) and the bow air box/storage.  You can also see the decking/coaming, which appears to be 1/4" plywood. 
    Now, who wouldn't want a boat like that?  Come on, I dare you.

    I think the key to a boat like this, isn't to build a copy of it, but to see what the results are of fiddling with the fit and finish of a craft.  I remarked to James once that it seemed like some of the boats that were at the Homebuilt Boat Show at the Seattle Center for the Wooden Boat http://www.cwb.org/cwb-seattle  were more exercises in craftsmanship than efforts to build boats.  However, I think now I see the point of that, as what is put into a boat in the build phase is a visible declaration of your skills, whether you keep the boat or give it away.

 
The rudder looks pretty much like a run of the mill pop-up rudder with a bungee cord hold down.  Note the cut off stern, which looks to simplify rudder mounting.  This boat has a push/pull tiller.

    So, while some may see the Annas Discorse as overworked Teal, and the Teal an under worked whatever (the Teal declaimed by those who want to carry a large crew or go really fast, I guess) I think it's much better than that.  On some boards, the Teal is poo pooed, but I consider it a valid craft and one reasonably well suited for single man sailing.  I suppose I might have the urge to have more folks in my boat, but honestly, I think I will be enjoying sailing as a solitary endeavor---not a party.


   Andrew Linn has a really neat website, which really showcases the various things he's built (and no, I probably won't come close to emulating him).  Still the page that shows off the rest of the appointments of his and Pat's work is here http://www.andrewlinn.com/080807_teal/annas_14.htm .

A Royal pain in the Chine

     Sort of bogged down.  Getting the chine logs (which provide for mechanical connection between the side and floor of the hull) warped to fit at the bottom the hull is, well, not fun.   Here is where haste to get materials will backfire.  The Teal is a 12 foot boat, but the chines and gunwale (top chord rails to us landlubbers) are going to be far longer than that.  When poking about Home Depot, I wound up getting 14 foot stock, which was barely adequate for the chines, but too darned short for the gunwales.  Well, I tried with miserable results to scarf and additional bit onto the gunwales, but the first attempt did not pan out.   I have found another source, but it would have been better to develop a Bill of Materials before I got started.

     Also found what an utter joy (did I say joy, I'm sorry, that's not the word) of pulling the chine up to the stem and trying to hold it there to run a screw in.  The book says to use a Spanish windlass, but the pieces don't more very well, and there is a slight other issue getting in the way.  Hmmmm?  Well, I varied from the plans (oh, old timers, quit snickering) as I wanted the chines to be more than just cut off on the end, you know, something rounded or such.    Fine, but you have to cut the end off first and then lose your handle (if your Spanish windlass doesn't work) to have a helper reef the chine over.

One little departure from plans can create much more fun than desired.  In this case I wanted the chines and gunwales to come together at the front, either as a point or a rounded point.   That is a very hard compound curve to cut out, and I failed miserably (both times).  I can always go back and fill the slot, or do what's in the original build and  cut them off square at the end of the hull.


This is the stern end.  You'll notice I had no fun pulling the chines over to the stem and getting them to stay put.  When you secure this, use a LONG screw, as you need to secure into the stem or the chine will just tear the luan right off the stem and you will not be happy.  The bolt through the end will substitute for the non-existent Spanish Windlass as I will drown the joint in Titebond II and then draw up the bolt, and then leave the mess for a few days and hope it sets up tight.  We'll see.


     In retrospect, I can think of a couple solutions to this issue, but of course I didn't think of those at the time, so I got a good pile of stuff from the cussword box and let at it.   No, that doesn't yield better results but.......

Thursday, August 5, 2010

Onward! Onward! Part II

  Ok folks, to bring you up to date.  It's still Tuesday, I have miscut sides and a creatively cut sheet of plywood that's supposed to fix the mess---here goes.......

   Those nice big sides are pieced together from 3 seperate pieces of plywood, bound together with two butt splice plates that are glue, nailed, and clinched (bending the nails over).  Well those splices won't come apart, no matter how much I wish.   Since I creatively broke the replacement sheet, there's no practical way to cut out a replacement side.   Well, I was rather in a mope and relayed as much to James, who thought I would call when I had the new side cut and done.  Well no such luck as he had to get me off my "moaning chair" (Payson fans make note) and steer me back out to make things happen.

   Ok.  I can't remake the main center portion of the hull and I can't salvage the butt plates--since there's no way to take them apart.  Now what?    Well, some study of the issue helped.  One thing I had to do was make sure the fore and aft ends of the new butt plates matched the fore and aft positions of the other hull half, as these are locators for the "temporary" frames that mount later.   Well if the center portion is shorter (by the 2 inches on either end from the cut off butt plates) then the ends have to be longer, and so must the butt plates to keep the fore and aft ends in the correct position.  Confused?

You can see the larger butt plate on the upper half of the hull.  The lower hull shows the original setup (which was cut off the center of the upper.  The side to the left had to remain constant to allow fitting of the frames.
  

   Once the butt splices were set and the side glued up, we hit the next interesting problem.  In Bolger's plans, the connection at the bow  and stern are called stems.  In the plans, they show these as triangular pieces of lumber that are about 22 inches long and which would be a breeze to make up on a table saw....which we didn't have.  James took a stab at cutting some with a saber saw and made up a 3 inch chunk.  This wasn't going to work out well.  Hmmmm, where to go?  James suggested Home Depot, but I figured they would laugh at us at best and sic lawyers on us for endangering their staff.   Hmmmm some more.  Finally I thought to visit a woodshop I knew was nearby.  Never had been in there before, but gee I needed something fixed, so let's go to the local wood mechanic, as it were.    James I think was doubtful, but what the hey eh?   The shop is Wood Fusion Studio http://www.woodfusion.com/ and taking a piece of 2 x 4 and the Instant Boat book with me, the owner (whose name I failed to remember) was able to take the 2x4 and make nice triangular stem pieces very quickly.  Thanks!

   So, back to the boat at hand.   With stems in hand, and a main frame made up, it was pretty much time to assemble.  For some reason though, it seamed the temporary frames didn't fit.  The ends fit up beautifully and a little more study showed that I was trying to put the temporary frames in the wrong places.  Swapping them about fixed the problem neatly.  It was suggested, and I like the idea, that the temporary frames (plywood) might be the basis for making a couple airboxes for the boat.  I thought they were a good idea, so slathering from PL Premium and fitting them in yielded a very nice start to the boat.  The other thing noted is that the thing is big (relative to a Harley 8.  Others might think the vessel is minuscule, but if I can lay down in it (more or less), it's pretty roomy.


Yours truly while laying out on the yet to come deck of the Teal.  People claim that there's not a lot of room inside, but for two, not terribly overside, folks I think it would work.   Weight would be a bigger problem for boat handling, but I'll deal with that when I get there.

Wednesday, August 4, 2010

Onward! Onward! Part I

   So time to take a big bite into this project.   Have a copy of "Instant Boats" by Payson.  Don't have the full sheet plans, but the book does give enough (in eye squinting type) to get you going BUT it WON'T answer a lot of questions if you've never built a boat before.  If you aren't as cheap as I am (and Payson has a few estimable words for folks like me) buy the plans http://www.instantboats.com/teal.htm.  If nothing else, it'll be the prod you need to keep going and get the boat built.


   Happily, the Bolger design is pretty straight forward and the start is a large scale drafting exercise.

See, all you need is a yardstick and a pencil--anybody can do it!
                                               
    Of course having the circular saw follow those cuts is another proposition....  Still, the pieces did come out the way they were supposed to, and aside from differences in height, were pretty much identical in shape.  Hurrah!  Now for assembly........  The nice thing about the Teal is that most of the hull elements (except the floor) can be cut out of one sheet of plywood--in this case 1/4" Luan.  Nice pretty wood--but the cutout of the sheet requires a sheet that finished on both sides--so the tan color on one side of the Luan sheet is going to wind up on the wrong side for some panels.   Of course that is if the panel come out as mirror images and not identical as I wound up doing.............. oops.

Oh, they look alike, but your looking at the bow on one side and the stern on the other, they are identical and since the hull isn't symmetrical--it just won't work.  Back to the drawing board.


    So what do you do with this sort of mess?   Well, the most practical thing that day was to put up the tools and deal with it tomorrow.   This fun started on a Tuesday and it'll be interesting to see how long it's going to go.

   Well, the next morning it is cool and a bit windy (odd for Missoula).  I need to get a replacement sheet of Luan and so back to Home Depot I go.  Pick it up, get it to the car, amuse a former fisherman from Alaska while trying to tie down a sheet with all the body of wet cardboard, and try to head home.   Well, got a ways when a sudden the panel gets away from my imperfect tie down work and saves me the trouble of trying to cut it down, but cutting itself for me and throwing a piece of itself onto the road.  Happily nobody was injured and a truck behind me didn't see fit the bash the one half of the sheet over my head.  However the reduced size sheet is really easy to tie down now--maybe I should have had Home Depot saw it down for me.

A more creative way to split a sheet of plywood--not recommended.


   Well still have side to rebuilt, don't I.  I think I'll put that off to the next installment, which promises to go a bit better than so far.

Tuesday, August 3, 2010

Beware of Friends bringing plans.....

    There are times when you share the enthusiasm of your friends, and that is a good things, and there are times when your friends share their enthusiasm with you, and that's how this whole thing started.   Actually about 10 hours ago to be exact.

    So, the start of this began when James Maxwell had a notion to build a boat.  Now he was entirely reasonable and sought to build a modest craft, a Harley 8.  The Harley 8 is meant for construction from one sheet (and a few odds and ends) of plywood.   Well, by and large this happened and if you look elsewhere  http://inlandpacket.yolasite.com/ you can follow his adventures with his Harley 8 through construction, testing and launching in its namesake waters.    Wild with success, he wants to do it again.

James Maxwell at the helm of his Harley 8 SV Wawona (named after a full size schooner that ended its days at the Center for Wooden Boats in Seattle Washington).  James is sailing nearby (Center for Wood Boats is in the background) on Lake Union.
    Should know better.  Still I got a couple chances to fiddle with his Harley 8 and it certainly was a challenge to make the boat do what it could.  However I could not claim success, and that sort of bothered.me.   James was regaling me on the new boat he was building, a 14 foot (over the Harley 8's eight feet) vessel requiring a trailer (vs car topping) and capable of carrying a whole bunch of folks (over the Harley's one point something--if that)
 
   And that's where I come in.........

   It is certainly and intellectual excercise to help somebody else build a boat, and it's certainly a test of one's ability to "figure" stuff out.   So it was well and fun and more fun when everything worked out pretty well.  A truth was learned that the Harley 8 thrived on wind, something our testing on Frenchtown Pond (in Frenchtown, Montana) failed to provide.  This stymied me and before I knew it I agreed to the idea of taking another stab at a Harley eight--I mean gee, $20 in materials--where could one go wrong?   www.pdracer.com/plans/harley-8.pdf

Results from the first go around at the lumber yard.

   Well, things morph (and how).   With the quick visit to Home Depot out of the way, and having printed the entire plan set on my printer, James gets the notion that "you won't be happy with that Harley 8".  Well sadly, his argument made sense, since there were various attributes about the Harley that probably wouldn't go away, no matter how refined the build.   Well, what else is there?   Well, there is the Bolger Teal, which is an attractive little boat, equally capable under sail or rowing, though not necessarily a powerhouse performer.   Still, it might be a good starter boat, certainly a little bigger (12 feet vs 8 feet) and, as said before, a very attractive vessel.

   One other practical consideration is that the Teal can still be hauled atop a smallish (Nissan Sentra) car.  There are other designs (the Puddle Duck Racer, etc) that might have better performance, but are lacking in looks, or plain just take more lumber.  I don't know just where this messing about in boats is going to take me (I'll let you know when I find out) but if the journey (vs just buying a boat) then the Teal ought to do the job.  So----a bigger boat, and back to Home Depot.